Friday, November 28, 2008

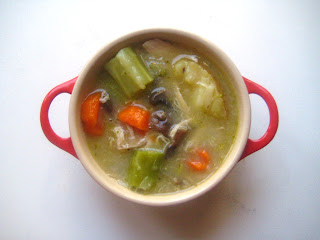
Miso Soup with Pork Spare Ribs

It's been a while, but this recipe has been demanded of me, so alas, I revive this blog with a recipe I actually took photos for several months ago, but never got around to actually posting.

Miso Soup with Pork Spare Ribs:


First, our vegetables: 1/2 head of Napa Cabbage, 3 stalks of green onions (scallions, if you will), and 1 block of medium firm tofu.


For the meat, here I'm using about 2 lbs of pork spare ribs, cut into 1in. pieces. (Ask your butcher to do that) I like them because they do make for a nice pork broth to serve as the base for the miso, but you can use any meat you'd like here, such as chicken breast. If you're using a boneless meat, just go with 1lb. Or you can skip the meat altogether if there are vegetarians abound.


Slice the napa cabbage into 1 inch wide strips, the tofu into 1/2 in cubes, and the scallions into 1in. pieces on the bias. This makes for a more stew like miso soup, with substantial enough ingredients to stand as meal on its own.

For a lighter version, skip the cabbage altogether, cut the tofu into 1/4 in. cubes ,and the scallions into small 1/4 in. pieces. Then you'll get miso soup that's more akin the starter that you get at Japanese restaurants.


So in a large pot or wok, bring around 8 to 10 cups of water to a boil, depending on how much water your pot can hold (keep in mind all the other ingredients that'll go in later).


Start with the spare ribs, and let the water come to a boil again. Around 5 minutes or so.


Then all at once, add your cabbage, tofu and scallions, and cover.


When that comes to a simmer, add one whole cap-ful of dashi (around 2 tablespoons). If you're making a vegetarian version, keep in mind dashi is made from fish~


Cover and let simmer on medium high for about 5 more minutes. You want to cook the ribs until they really start to pull away from the bone and the meat can be pulled apart quite easily.


You can see how much the ingredients have shrunk after a while. Also, depending on the spare ribs you get, they can give off a lot of fat. So at this stage, I like to skim off some of the oil that comes to the surface.


And now we add our miso. There are quite literally 8 million manufacturers of miso in the world, but really only 2 main varieties: red ("akamiso") and white ("shiromiso"). As far as taste goes, more often than not, red has a deeper flavor than white, but again, that also depends on the manufacturer.

So when it comes to what varieties taste like what, it's really all up in the air. Most American supermarkets will have a very limited selection of miso to begin with. For example, this brand of miso was all I could find at Whole Foods.

Go to Japanese market however, and you'll find an entire shelf filled with nothing but miso. At the point, just grab whatever, and see how you like it.


For a large volume of soup like this, you'll need about 3 or 4 heaping tablespoons of miso. Turn the heat down to medium, and spoon the miso (one tablespoon at a time) into onto your ladle.


And with another small spoon, OR CHOPSTICKS, break up the miso in the ladle until it dissolves completely. Miso doesn't dissolve that well by itself if you just lump it into the pot.


It's important to wait until the very end to add the miso, and on low to medium heat. Boiling miso will actually kill the flavor. So be sure to turn the heat down to medium to medium low before you add the miso.

Also, flavor to your liking here. 3 heaping tablespoons is for this particular brand of miso. Have taste before you add another tablespoon. You might need more or less depending~


And alas~ You have a nice hearty Japanese soup. You can add udon or ramen to make this a full meal.


SO, your ingredient list:

Miso Soup with Pork Spare Ribs

- 1/2 head of napa cabbage
- 3 stalks of green onions (scallions)
- 1 block of medium firm tofu
- 2 lbs of pork spare ribs
- 8-10 cups of water
- 2 tablespoons dashi
- 3 large tablespoons of miso

Saturday, July 26, 2008

Japanese White Chicken Curry (Gratin)

So it's not so much of a curry as is it is a cream stew... in fact, there's no curry in it all. I don't really know how it started, but since I was little, I've been calling this white curry, so the name kinda stuck. Oh well.

So just a heads up, this is also a two-day recipe, but it's not required really. As with any stews or thick soups, it's always better the next day because the flavors meld and whatnot, but if you can't wait, it's not a big deal.

SO HERE WE GO:


This makes a solid 4 to 6 portions. Our vegetables from left to right: 2 medium onions, 2 medium potatoes, a cup of mushrooms (4 oz, or half a container), two medium carrots (I ended up adding another one later), and one medium head of broccoli.


With white curry, I generally like to go with white meats, such as chicken, turkey, or pork. It keeps the dish nice and bright in my opinion. These are two chicken breasts that I pulled off a whole rotisserie chicken that I got at Whole Foods for $9.99.

I'll do a post later next week about making the most of these store-bought chickens. At under 10 bucks ($5.99 even at supermarkets like Safeway or Albertsons), they're pretty cost-effective if you're looking to make meals ahead of time.


The preparation of this dish is very similar to the nikujaga recipe. In fact, it's more or less identical except for the later stages. We begin by sweating the vegetables over medium heat with about two tablespoons of butter or oil or even non-stick spray.

Butter is preferable, as it compliments the rich-ness of this dish, and if you use oil, use canola or vegetable oil. The inherent flavor of olive oil, especially extra virgin, is a little overpowering if used here. The same goes for most (if not all) Asian dishes actually. Stick with canola, peanut, or vegetable oil. Save the olive oil for Italian dishes.


Cook for about 5 to 10 minutes, just until the vegetables start to give off some of their moisture.


This is called "sweating," by the way. We're cooking until the onions start to turn translucent around the edges and mushrooms soften. Don't forget to season your vegetables here with some salt. No pepper though. You don't want little black specks floating around your stew~


Then, like with the nikujaga recipe, add enough water to cover your vegetables. Add at most 5 cups if you're only using 1 box of sauce mix.


And bring this to a boil. At this point, I also like to add around a tablespoon of dashi.


Then we add our "tasty cream stew sauce mix." The same goes with these mixes as with the curry mixes. If you made a cream sauce yourself (or bechamel sauce, if you want to be pretentious), it wouldn't taste the same. It would taste kinda like a chicken pot pie filling.

Again, concentrated cubes of Japanese goodness wins.


Because our chicken is already cooked, and the broccoli doesn't take long to soften, we add these in last, after we've added our stew mix. As you can see, I just shredded the chicken breasts by pulling it apart by hand into bite-sized pieces.


Give it a good mix, and cover and simmer over low heat for a good half hour to 45 minutes at least. The longer the better, depending on how you like your vegetables cooked.

Again* 1 box of sauce mix is good for about 5 cups of added water. I'd pick up a couple boxes so that you if you add too much water, you can thicken it back up, or if you like thicker sauce, then you can add single cubes until it's thick to your liking.


As you can see, a lot of the vegetables shrink down, and the chicken starts to break apart too. I used pre-cooked breast meat here, which does break apart like this in stews.

If you want chunks of chicken, go with raw chicken breasts or thighs.

Cut it up into cubes, saute it quickly over medium high heat to brown the edges, and remove from the pan. Then proceed with the vegetables and etc. Then add it back into the stew with the broccoli. Of course, thigh meat works just as well and tends to stay more tender over long cooking times.


From here, you can let this cool, and let it sit in the refrigerator overnight. This will give the stew a chance to settle and let the flavors meld. Again, this isn't mandatory, so if you'd like, you can skip the cooling, and move straight onto the gratin part.


In a small bowl, melt 1 tablespoon of butter in the microwave for about 2 minutes.


While that's melting, spoon some of the curry into an oven-safe dish, such as my French onion soup bowl! Also, turn on your broiler to its highest setting. I just use my toaster oven set to broil.


Once it's melted, add a little bit of salt.


And toss in a handful (about half a cup) of panko.


Give it a good stir and top your stew. Be liberal with this; the layer should be about a quarter inch thick. Pop it in the broiler, and stay watching it. It only takes less than a minute for the panko to take on a nice golden brown.


Serve alongside white rice and a couple slices of French baguette.


And top with parsley and garnish with green onion that you won't eat to be doubly egregious.


Extra points if you eat this in an over-exposed environment.


The gratin topping isn't really necessary, but it does add a nice texture to the dish.


The chicken for the most does retain it's shape.


And the carrots with the riffle cut is mandatory. If you don't have a riffle cutter, you can't make this dish. I'll fight you with my bare hands if you dare make this dish without a riffle cutting your vegetables.


What's great about stews like this (such as the Japanese hamburgers from the last post), is that the leftovers taste even better. So I strongly suggest making this in a large batch, and saving it for throughout the week. Split the pot up into individual tupperware containers and you can keep 'em for up to about a week and a half in the refrigerator, or freeze them and they'll keep for around 1 months to a month and a half.

Alrighty, here's your ingredient list for this dish:

// Japanese White Curry
makes 4-6 servings

2 - medium onions
2 - medium potatoes
2 - medium carrots
1 - head of broccoli
4 oz - sliced mushrooms (half a container)
3 tbsp - butter (2 for the vegetables, 1 for the gratin topping)
1/2 cup - panko
1 tbsp - dashi
salt to taste
water to cover

Enjoy~ I made this at the start of the week when I made the hamburgers, so I now have a solid week and a half of food prepared, so my next couple posts won't be whole dishes, but rather some small tips and things like that.

Such as that chicken thing I mentioned earlier. If there's anything you'd like me to make, or any questions you may have that you'd like me to blog about, let me know!

I'LL MENTION YOU IN THE POST AND YOU CAN BE FAMOUS. holy crap.

Wednesday, July 23, 2008

Japanese Hamburgers with Curry


Minasan! Sorry I missed the weekend post. I went to go see the Dark Knight in IMAX, which was more important than anything ever. If you haven't seen it yet, then shame on you. If you're in a foreign country, like I know some of you are, then... well... ha.


Anyway, I made a bunch of stuff at the head of this week, the first of which being Japanese hamburgers.

Along with a dish called "omurice," which I suppose you can call a portmanteau of "omelet" and "rice," Japanese hamburgers are long considered a staple of the branch of Japanese cuisine that has been inspired by the West.

Unlike American burgers, Japanese hamburgers and a lot thicker and a lot softer, and are meant to be eaten with rice and served with a sauce instead of between two buns. It's closer to Salisbury steak than it is to hamburgers, actually, but taste a whole lot better. I've yet to come across an enjoyable Salisbury steak.


So let's begin. Just a heads up, this dish makes 8 quarter-pound burgers. Have one for lunch, or two for dinner, however hungry you are. I cook for the week, so scale down accordingly if you only want to make a little... but why would you? muahaha.


Our vegetables from left to right: A medium onion, about 1 cup of mushrooms (not 3 single mushrooms), one egg (sure, let's call it a vegetable), and one head of broccoli. You can get just the broccoli crown at supermarkets, but they're more expensive per pound, and when it's in a stew, the stem is just as tender as the crown, so why not.

Oh, and for the mushrooms, they're usually sold in 8 oz. containers, so we'll be using half the container, if that's an easier measure.


Our meat~ 1 and a half pounds of lean ground beef and a half pound of ground pork. The ratio you want here is 3 to 1, so this is where you can scale accordingly to however many hamburgers you want to make. I know it doesn't look like 3 to 1 in the picture; there was another half pound of beef that wouldn't fit on the board.


I'm not cooking it yet, it's just that I don't have any large mixing bowls here, and my large sauce pan was the only thing big enough, so... yeah.


Anyway, before you add any of the other ingredients, start by mixing the beef and pork together.


Then beat in one egg.


Then our binders and seasoning to help hold the ground meat together:


A sprinkle of nutmeg, about 2 teaspoons. It doesn't add too much flavor wise, but it does give the hamburgers a very nice aroma. It's one of those things you can't point out when eating it, but you'll definitely notice it if it's not there. And yes, pre-ground nutmeg works just fine in my opinion. Why? Because that bottle was 99 cents. That's why.


A cup or so of Panko. Panko, as so boldly stated with two layers of drop shadow on the packaging above, is Japanese bread crumbs. It's a lot lighter than American bread crumbs.


They're almost like coarsely ground bread crumbs whereas American bread crumbs are finely ground. Panko is great for topping gratins and other similar dishes where a nice crust that's finished under the broiler is called for.


This is dashi, which I have mentioned before in my post on nikujaga. It's made from dried fish, and it's what makes Japanese things taste Japanese. It just does. If you don't have this because you're in, say, Germany, or Ireland, then it's not too big of a deal. I've made this plenty of times before without it and it tastes just fine.


Here's half the medium onion, minced finely. It's important to dice this as small as possible, as large chunks of onion will prevent your burgers from holding together very well, and when they cook, they might fall apart.


Other things to add that weren't pictured: salt and soy sauce to taste. I usually go with about a couple teaspoons of salt and around two tablespoons of soy sauce (Note, this depends on your particular soy sauce. Some are made a LOT stronger than others, so add accordingly)


Divide it eighths, like a pie.


And form each one into ovals about an inch thick. Japanese hamburgers are rarely circular. And sure, add a sprig of parsley to make it look egregious. Now, wrap this plate in plastic wrap and let it sit in the fridge for a day. This will allow all the ingredients to meld and to let the seasonings settle into the meat.

If you're in a hurry, or if you didn't know this was a two-day recipe because I never told you at the beginning of this post, then it's not a big deal. They'll still have time to settle while we make the curry sauce.


So, slice the mushrooms and the remaining half of the onion, and throw them in a medium sauce pot with about a tablespoon of butter. Season with salt and pepper.


About 10 minutes later they'll start to pick up a nice brown on the edges.


Alas, I use store-bought curry mixes. Why? Because it's easy, and, oddly enough, if you make this with actual curry powder, for some weird reason it just doesn't taste like Japanese curry, it'll taste like Indian curry.

Japanese curry is a lot more mellow. I don't know what they do with the mixes, but whatever it is, they've managed to harness all the Japanese-ness of Japanese curry into a single set of 8 one inch by one inch concentrated cubes of flavor.

Anyway, the above picture I didn't take, I found it on Google. I forgot to take a picture of the mix I use before I threw it away. Vermont is good, but I also like House. They're all good though, and the instructions are essentially the same. Add water, and when it comes to a boil, break in the cubes, and stir to make sure they dissolve.


It's really that simple. What's great about it being cubes is you can make as much or as little as you want. For this, I used the entire box. But you could easily make a single serving by adding about a cup of water to two of the cubes. Good stuff.


Broccoli cooks quickly, and since we're going to be heating this sauce up again later when we make our burgers, add them in towards the end.


Simmer for about 5 minutes, and let it cool, then park it in the refrigerator. Or, if you're going straight into making the hamburgers, then put it on the back burner on low heat with the cover on.


So now we can start making our burgers. The key here, like with cooking many meats, is to start on medium to medium high. A common mistake (and one that I made for a long, long time before I finally realized it), is to crank the pan all the way to high because you think that'll make things cook faster. While that's true, it means only the outside will cook faster, meaning the outside will burn faster, all the while the center stays raw.

SO, start on medium heat, and be patient. 3 minutes on each side. Of course, this depends on your range. Medium on some ranges is hotter than medium on other ranges. If after 2 minutes you see your burgers have already taken on a nice crust (as seen in later pictures), then flip it, and lower the heat, and go for longer on other side. Cover the pan during this time to let it sort of quasi-steam the burger too.


In the meantime, our sauce is on the back, heating. Be sure to stir it every once in a while to make sure nothing sticks to the bottom.


3 minutes later and we can flip. It's also important not to crowd the pan. Even though we have 8 burgers to cook, I'm making them in 2 batches. You want to give the burgers enough room so that they don't touch each other.

If you crowd the pan all at once, the juices from the burgers will fill the pan faster than they can evaporate, and this pool of juice at the bottom will thus prevent your burgers from generating a nice crust. If your pan will only allot 2 comfortably, then do it in 4 batches. It's worth it.


While you can't tell from the angle of this photo, try to flip your burgers to a new part of the pan. So instead of flipping them over onto the same spot, scooch it over just a little bit. The part of the pan where your burgers were before you flipped are actually a bit cooler than the rest of pan, so introducing the raw side of these burgers to the hottest parts of the pan will help you attain the same sear on the other side.

After another 3 minutes covered, remove them from the pan. Let the pan heat back up (to medium, medium high), and cook your second batch.


After the second batch finishes, introduce your first batch back into the pan.


Then pour the entire pot of curry into the pan. At this point, the burgers are still rare in the center. So we need to stew them in the sauce for about 20 minutes.


This way, the burgers also pick up the flavor from the curry, so it's not just burgers with curry sauce, IT'S CURRY BURGERS. Holy crap.


Because they look done from the outside, a good way to test the done-ness of your burgers is by poking it with a toothpick, and seeing what color the juice is that comes out of it.


If you look closely, you should be able to see that the juices coming out of this burger have a reddish hue to it. What you want for well-done burgers is clear juices. And because of the onions, egg, and panko, a well-done Japanese burger is still very tender.


Serve with white rice, a couple slices of French baguette, and EXACTLY two broccoli florets and EXACTLY two slices of mushroom. No more, no less, or you'll be dishonoring the entirety of Japanese cuisine.


Here's the classic top view, for whatever reason it is that makes top view photos cool.


I lie, you can serve as many broccoli florets and mushrooms as you like, but I find this whole pairs deal makes this presentation doubly egregious, which is always a plus. Especially the sprig of parsley.


GOLDEN BROWN CRUST.


GOLDEN BROWN MUSHROOMS.


GOLDEN BROWN BREAD, and I guess some hamburger too.


See? This is a lot less egregious, but it's really damn delicious. Slide a sunny-side up egg on top, and break into it, letting the yolk run down into the burger.


Nom.

So, here's an ingredient list. I realized I should have done this for all the past recipes, but... whatever. Alas!

// Japanese Hamburgers with Curry Sauce

1 & 1/2 lbs. - Ground Beef
1/2 lb. - Ground Pork
1 - Head of Broccoli
1 - Medium Onion 4 oz. - Mushrooms
2 tsp - Nutmeg
1 tbsp - Dashi
2 tsp - Salt
2 tbsp - Soy Sauce
1 cup - Panko
1 - Egg (2 if you want an egg on top later on)
1 box - Curry Mix

The dashi, salt, nutmeg, soy sauce, and Panko are all estimates. Flavor to your liking~ If you're unsure, then under-flavor for now. You can always sprinkle on more salt or soy sauce in the end, but you can't take away if you've added too much.

As for the Panko, what you're looking to do is sop up some of the moisture from the mix. Enough for the burgers to still be moist to the touch, but dry enough to hold their shape.

Here's a tip. To check your seasoning, make an uber-mini burger. Pick off a small bit of your mix, and fry that up. See how it tastes. Then you can season the rest of your mix accordingly. And if you've realized you added too much seasoning, then you can curse the heavens.

Enjoy! This dish is one of my favorites.